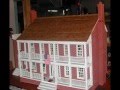
I just spent a lovely, snowy, three-day weekend working on the finishing touches of the Library.
 I had hoped for a sunny day to take the photographs, but if I waited for that I'm afraid it might be May or even June before you see any! I'll eventually have my photographer friend over to snap a few decent shots but until then you will have to put up with mine.

One of my favorite new additions is the red-shaded lamp on the desk which I picked up at the local dollhouse shop, Little Enchantments. It throws just enough light to catch the desk's painted detail. The built-in bookshelves are all filled with books and objet d'art. I'm afraid I did not make the books --they are all bought-- but I did add a little gilding to their spines with a gold pen. Eventually, I would like to have books that have printed pages, but for now, these will do...
 I also 'color blocked' the books and think they look neater than when I had them just thrown in willy-nilly. Not sure if they would have hung a little painting on the shelves like this, but I happen to like that effect --so there! I received the little steps from New England Miniatures right before I got sick a couple months ago and sort of forgot about them. But here they are! Hey --check out the gold piping on the back of the chair! I made the piping from embroidery floss on my Krazy Cords toy! (Thanks for the tip, Catherine)!

Here's a shot of the fireplace side. I have a lamp shining through the windows because it's so terribly gloomy outside in real life...but it's always sunny at Merriman Park!
I added a fire in the grate of my Braxton Payne fireplace. A fire in the Library is always so cozy, don't you think? I was going to place an ormolu clock on the mantel but I figured with the grandfather clock standing just a few feet away it might be a little redundant, so I placed some tulips there instead. A touch of spring in the dead of winter. Wish you could better make out the figurines on the mantel shelf. They're 'vintage Japanese' totchkes I found on Ebay.
Now, I have to show you a closer view of the portrait hanging over the fireplace:
No doubt Mrs. Nathaniel Allen would have been labeled 'a handsome woman' in her day. Her curious, life-sized portrait hangs in the Minneapolis Institute of Art and remains one of my favorites, perhaps because she is the very image of my friend, John Brewer.
To the best of my knowledge, my friend John does not have a secret penchant for eighteenth-century drag.
His family came to this country in the nineteenth-century by way of
Germany and Norway, so there is scant chance that he had an ancestor who frequented molly bars in ye-olde Colonial Boston.
And yet...there hangs this portrait...his portrait? Hmmmm...
I shrunk down an image of Mrs. Nathaniel Allen --(or my friend, John)-- whoever it is! Anyway, I shrunk it down and over-painted it with Mod Podge, using a tiny brush and trying to mimic the same strokes as the artist. Once dry and framed, it is difficult to tell that it is not a 'real' miniature oil painting that cost hundreds! (Thanks, Ray, for the tip)!
I like how the painting's cool tones bring the similar colors of the hallway beyond the doorway into the room.
 Well, I do hope you like the Library. Of course, there are a few more odds and ends I would like to add here and there but you know how it is...is a dollhouse room ever completely finished?
Have a great week, everybody!


One of my favorite new additions is the red-shaded lamp on the desk which I picked up at the local dollhouse shop, Little Enchantments. It throws just enough light to catch the desk's painted detail. The built-in bookshelves are all filled with books and objet d'art. I'm afraid I did not make the books --they are all bought-- but I did add a little gilding to their spines with a gold pen. Eventually, I would like to have books that have printed pages, but for now, these will do...


Here's a shot of the fireplace side. I have a lamp shining through the windows because it's so terribly gloomy outside in real life...but it's always sunny at Merriman Park!
 |
| Still having 'issues' with these chandeliers (grrr)! & I may replace them! |
Now, I have to show you a closer view of the portrait hanging over the fireplace:
 | ||||
| Mrs. Nathaniel Allen (1763) by John Singleton Copley |
 |
| Mrs. Nathaniel Allen 1763, or Mr. John Brewer 2013? |
And yet...there hangs this portrait...his portrait? Hmmmm...
I shrunk down an image of Mrs. Nathaniel Allen --(or my friend, John)-- whoever it is! Anyway, I shrunk it down and over-painted it with Mod Podge, using a tiny brush and trying to mimic the same strokes as the artist. Once dry and framed, it is difficult to tell that it is not a 'real' miniature oil painting that cost hundreds! (Thanks, Ray, for the tip)!
I like how the painting's cool tones bring the similar colors of the hallway beyond the doorway into the room.

Have a great week, everybody!


.jpg)


.jpg)